Testing
skeeze (Public Domain)Table of Contents
- Foreword
- Preface
- Introduction
- What is Webpack
- Developing
- Getting Started
- Development Server
- Composing Configuration
- Styling
- Loading Styles
- Separating CSS
- Eliminating Unused CSS
- Autoprefixing
- Loading Assets
- Loader Definitions
- Loading Images
- Loading Fonts
- Loading JavaScript
- Building
- Source Maps
- Code Splitting
- Bundle Splitting
- Tidying Up
- Optimizing
- Minifying
- Tree Shaking
- Environment Variables
- Adding Hashes to Filenames
- Separating a Runtime
- Build Analysis
- Performance
- Output
- Build Targets
- Multiple Pages
- Server-Side Rendering
- Module Federation
- Techniques
- Dynamic Loading
- Web Workers
- Internationalization
- Testing
- Deploying Applications
- Consuming Packages
- Extending
- Extending with Loaders
- Extending with Plugins
- Conclusion
- Appendices
- Comparison of Build Tools
- Hot Module Replacement
- CSS Modules
- Searching with React
- Troubleshooting
- Glossary
Testing is a vital part of development. Even though techniques, such as linting, can help to spot and solve issues, they have their limitations. Testing can be applied to the code and an application on many different levels.
You can unit test a specific piece of code, or you can look at the application from the user's point of view through acceptance testing. Integration testing fits between these ends of the spectrum and is concerned about how separate units of code operate together.
Often you won't need webpack to run your tests. Tools such as Jest, Cypress, and Puppeteer cover the problem well. Often there are ways to adapt to webpack specific syntax in case you are using webpack features within your code.
In this chapter, you'll see a few ways to run testing tools with webpack as that's still an option that lets you benefit from webpack specific functionality.
Mocha#
Mocha is a popular test framework for Node. While Mocha provides test infrastructure, you have to bring your asserts to it. Even though Node assert can be enough, it works with other assertion libraries as well. mocha-loader allows running Mocha tests through webpack.
To get started, include Mocha and mocha-loader to your project:
npm add mocha mocha-loader --develop
To have something to test, set up a function:
tests/add.js
module.exports = (a, b) => a + b;
Then, to test that, set up a small test suite:
tests/add.test.js
const assert = require("assert");
const add = require("./add");

describe("Demo", () => {
  it("should add correctly", () => assert.equal(add(1, 1), 2));
});
Configuring Mocha#
To run Mocha against the test, add a script:
package.json
{
  "scripts": {

    "test:mocha": "mocha tests"

  }
}
If you execute npm run test:mocha now, you should see the following output:
Demo
  should add correctly


1 passing (5ms)
Mocha also provides a watch mode which you can activate through npm run test:mocha -- --watch. It runs the test suite as you modify the code.
--grep <pattern> can be used for constraining the behavior if you want to focus only on a particular set of tests.Configuring webpack#
Webpack can provide similar functionality through a web interface. The hard parts of the problem have been solved in the earlier chapters of this book. What remains is combining those solutions through configuration.
To tell webpack which tests to run, they need to be imported somehow. The Dynamic Loading chapter discussed require.context that allows to aggregate files based on a rule and it's ideal here.
Set up an entry point as follows:
tests/index.js
// Skip execution in Node
if (module.hot) {
  const context = require.context(
    "mocha-loader!./", // Process through mocha-loader
    false, // Skip recursive processing
    /\.test.js$/ // Pick only files ending with .test.js
  );

  // Execute each test suite
  context.keys().forEach(context);
}
A small change is required in webpack configuration:
webpack.mocha.js
const {
  MiniHtmlWebpackPlugin,
} = require("mini-html-webpack-plugin");
const { WebpackPluginServe } = require("webpack-plugin-serve");

module.exports = {
  mode: "development",
  entry: ["./tests", "webpack-plugin-serve/client"],
  watch: true,
  plugins: [
    new WebpackPluginServe({
      port: process.env.PORT || 8080,
      static: "./dist",
      waitForBuild: true,
    }),
    new MiniHtmlWebpackPlugin(),
  ],
};
If you have implemented book configuration so far, this is a good spot to write the configuration using the utilities.
Add a helper script to make it convenient to run:
package.json
{
  "scripts": {

    "test:mocha:watch": "wp --config webpack.mocha.js"

  }
}
If you execute the server now and navigate to http://localhost:8080/, you should see the test:
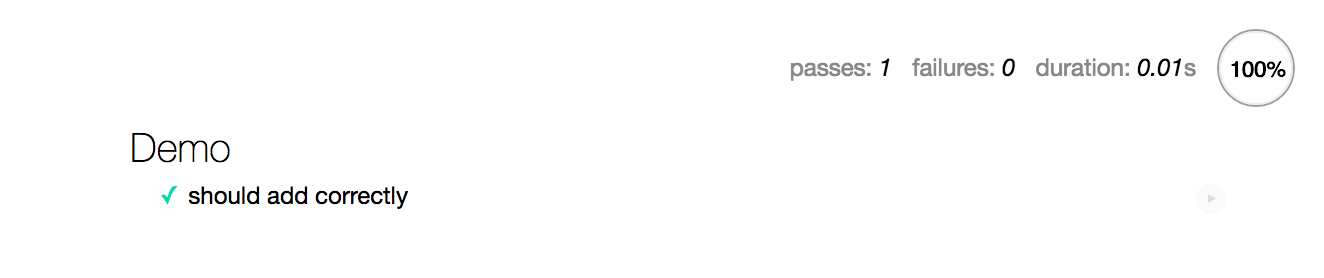
Adjusting either the test or the code should lead to a change in the browser. You can grow your specification or refactor the code while seeing the status of the tests.
Compared to the vanilla Mocha setup, configuring Mocha through webpack comes with a couple of advantages:
- It's possible to adjust module resolution. Webpack aliasing and other techniques work now with the caveat of tying the code to webpack.
- You can use webpack's processing to compile your code as you wish. With vanilla Mocha that would imply more setup outside of it. On the downside, now you need a browser to examine the tests.
mocha-loader is at its best as a development helper. The problem can be solved by running the tests through a headless browser.
Jest#
Facebook's Jest is an opinionated alternative that encapsulates functionality, including coverage and mocking, with minimal setup. It can capture snapshots of data making it valuable for projects where you have the behavior you would like to record and retain.
Jest follows Jasmine test framework semantics, and it supports Jasmine-style assertions out of the box. Especially the suite definition is close enough to Mocha so that the current test should work without any adjustments to the test code itself. Jest provides jest-codemods for migrating more complicated projects to Jest semantics.
Jest captures tests through package.json configuration. It detects tests within a tests directory automatically. To capture test coverage information, you have to set "collectCoverage": true at "jest" settings in package.json or pass --coverage flag to Jest. It emits the coverage reports below coverage directory by default.
Porting a webpack setup to Jest requires more effort especially if you rely on webpack specific features. The official guide covers quite a few of the common problems. You can configure Jest to use Babel through babel-jest as it allows you to use Babel plugins like babel-plugin-module-resolver to match webpack's functionality.
Mocking#
Mocking is a technique that allows you to replace test objects. Consider using Sinon for this purpose as it works well with webpack.
Removing files from tests#
If you execute tests through webpack, you may want to alter the way it treats assets like images. You can match them and then use a noop function to replace the modules as follows:
const config = {
  plugins: [
    new webpack.NormalModuleReplacementPlugin(
      /\.(gif|png|scss|css)$/,
      "lodash/noop"
    ),
  ],
};
Conclusion#
Webpack can be configured to work with a large variety of testing tools. Each tool has its sweet spots, but they also have quite a bit of common ground.
To recap:
- Running testing tools allows you to benefit from webpack's module resolution mechanism.
- Sometimes the test setup can be quite involved. Tools like Jest remove most of the boilerplate and allow you to develop tests with minimal configuration.
- You can find multiple mocking tools for webpack. They allow you to shape test environment. Sometimes you can avoid mocking through design, though.
You'll learn to deploy applications using webpack in the next chapter.
This book is available through Leanpub (digital), Amazon (paperback), and Kindle (digital). By purchasing the book you support the development of further content. A part of profit (~30%) goes to Tobias Koppers, the author of webpack.